

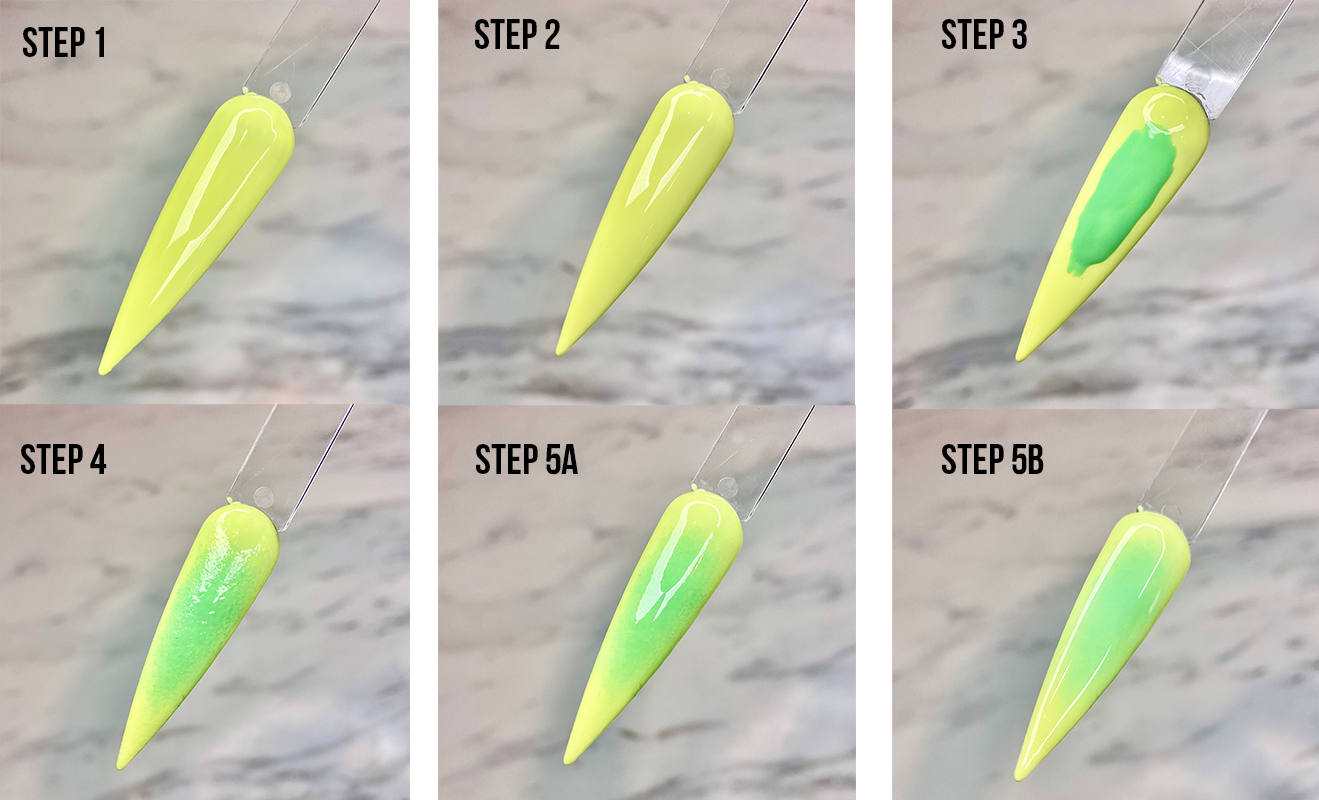
- To start, you will need two colours for your design. It is best to go with colours in the same family (in this example we used Ugly Duckling Gel Polish #135 and #172), but you can choose any combination you like. Start by applying your background colour and cure for the full recommended time.
- Apply a tack-free or matte top coat to work on as a base and cure fully. We love the new Fuzion HEMA-Free “Shiny” top coat for this.
- Next, apply your second colour in the middle of the nail in a circular/round shape depending on nail length (it doesn’t need to be perfect). Leave enough space around the edges to blend the colour outwards. It’s best to use a pigmented gel such as the En Vogue Simply Paints or Ugly Duckling Gel Polish. Do not cure.
- Lightly blend out the edges. The Ugly Duckling Ombre II Brush is ideal for creating a flawless blend by diffusing the edges of the “aura” with stippling motions. Keep the brush clean with a dry wipe as you work to prevent it from picking up too much colour, which can interfere with blending. Don’t worry if it looks a little textured – the top coat will smooth everything over at the end. Cure your design when you’re finished blending.
- Finish with your favourite shiny or matte top coat (try Fuzion’s Extreme Shine for long-lasting, stain-resistant shine, or their Matte Topcoat for a completely shine-free look). Tip: Use a tinted top coat such as Fuzion’s Soft White “Veil” to help your design appear even smoother.
You can also experiment with translucent chromes, pigment powders, and layered nail art for unique looks! Be sure to share your creations with us by tagging @creatabeauty on Instagram and TikTok.